SWITNEX 4 Channels Wireless Relay Remote Control Switch User Manual
SWITNEX 4 Channels Wireless Relay Remote Control Switch User Manual
| Technical Data | |
|---|---|
| Operation Mode | Toggle, Momentary, Latched |
| Current Rating | 10 Amps |
| Operating Voltage | DC 6V~30V (compatible with 5V, 12V, 24V, 30V) |
| Contact Type | Normally Open, Common, Normally Closed |
| Connector Type | Wireless (433MHz RF) |
| Terminal | Screw |
| Circuit Type | 4-way |
| Actuator Type | Push Button (on remote) |
| Contact Material | Copper |
| Package Dimensions | 5.16 x 3.23 x 2.2 inches |
| Weight | 7.05 ounces |
| Batteries | 2 x 12V batteries (included for transmitters) |
| RF frequency | 433MHz |
| Receiving sensitivity | >-105dBm |
| Receiving range (open space) | Up to 50 meters |
| Storage remote controls | Up to 20 pieces |
| Relay lifespan | Over 100,000 operations |
Product Detail
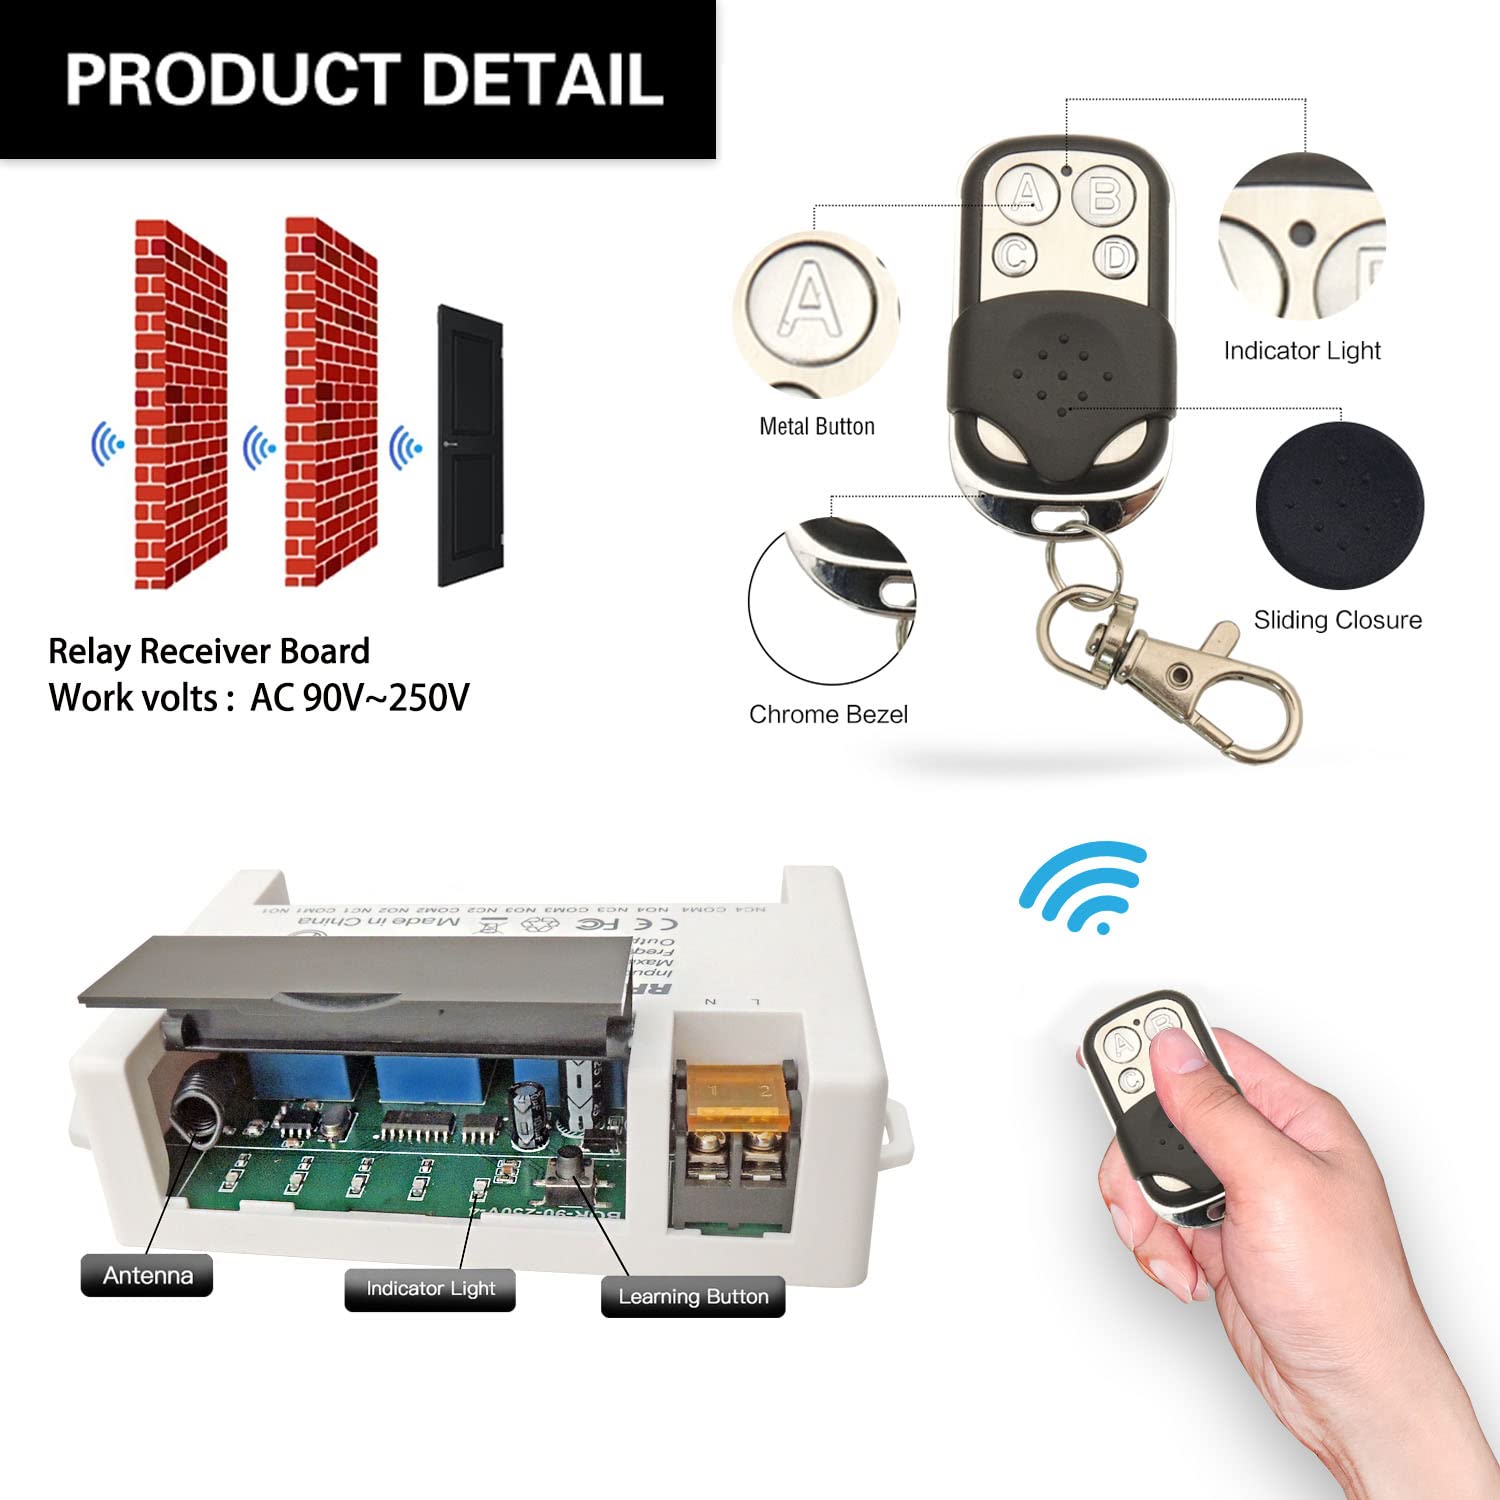
- Receiver module – 4 independent relays, large screw terminals, learning button, indicator LED
- 2 x Keyfob transmitters – 12V batteries included
- NO: Normally open pin (each relay)
- COM: Common pin (each relay)
- NC: Normally closed pin (each relay)
- Power terminals: VIN (DC 5V-30V positive), GND (negative)
Wiring Diagram
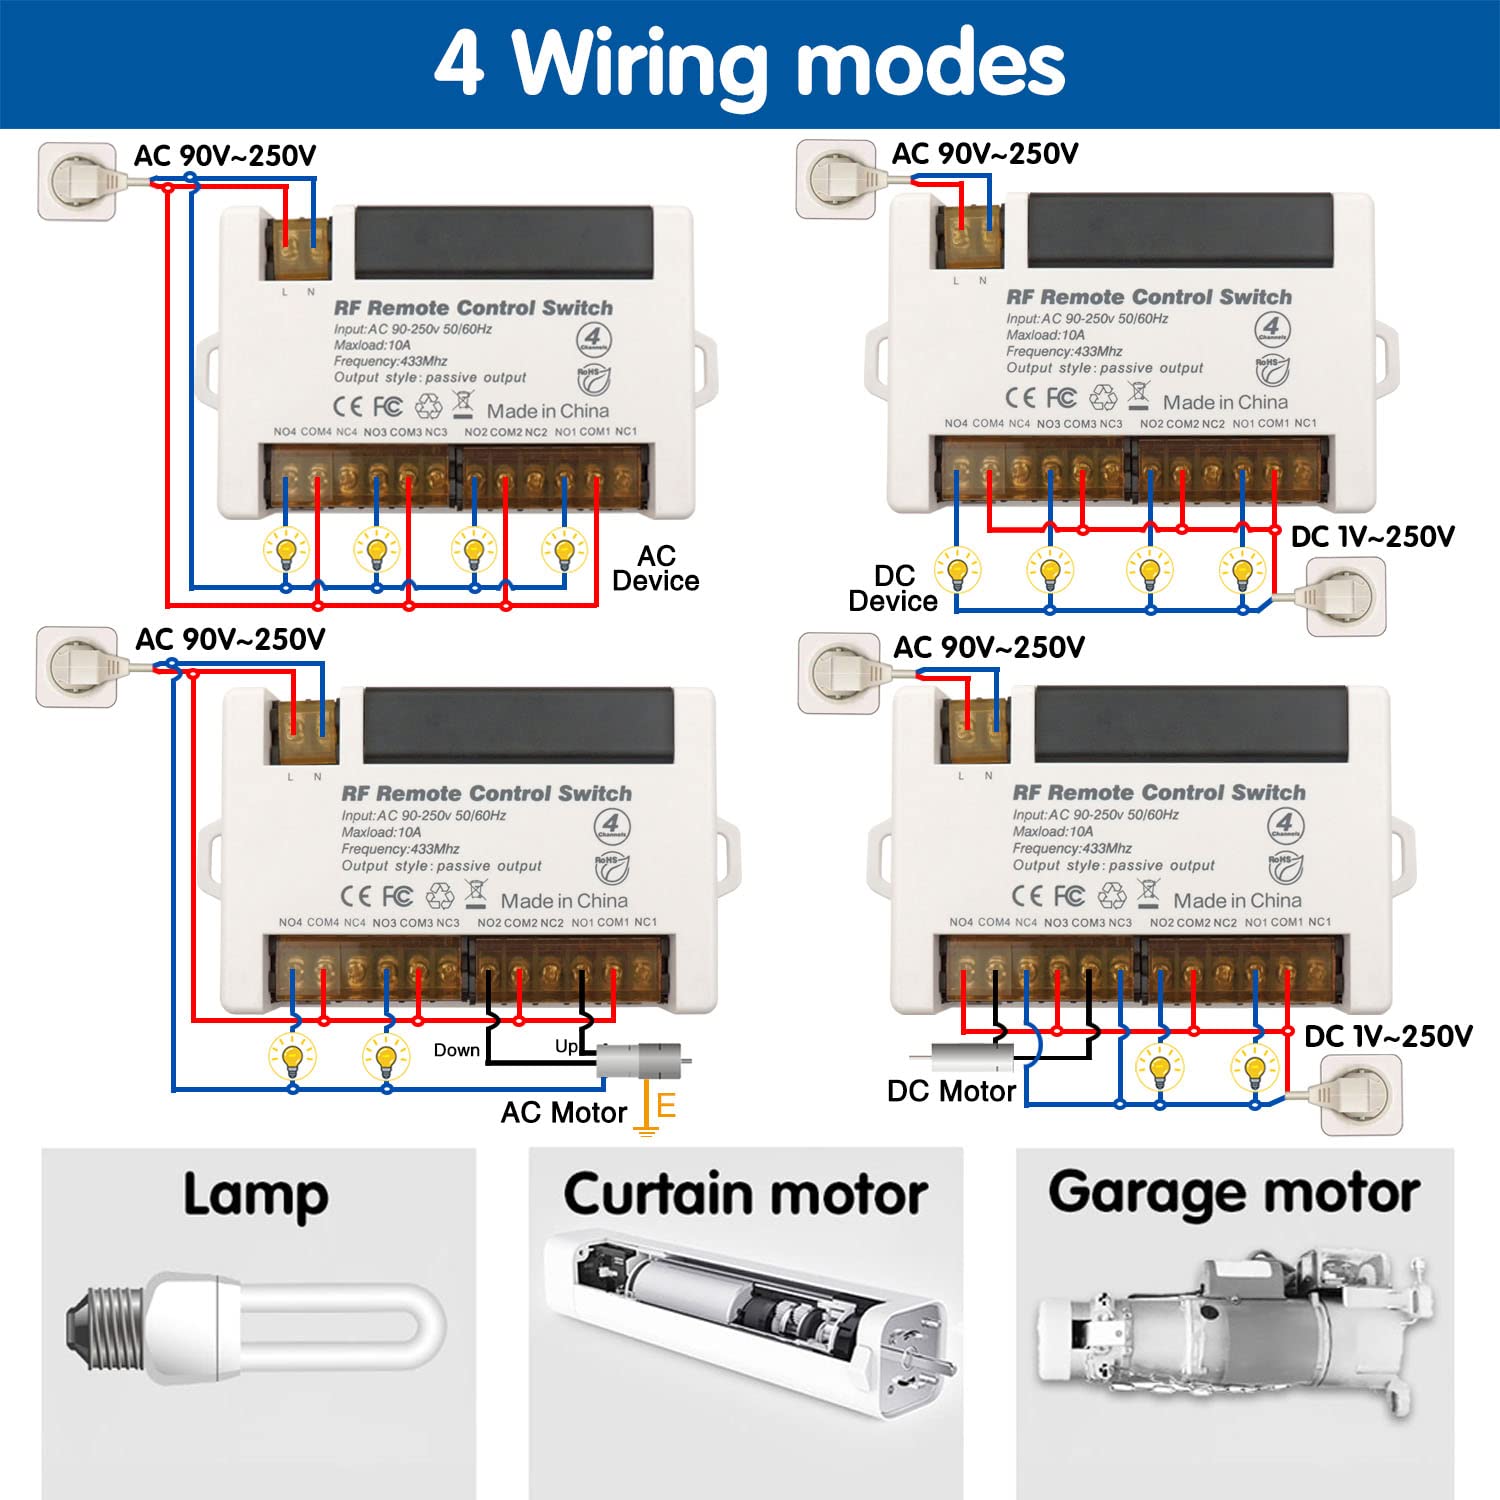

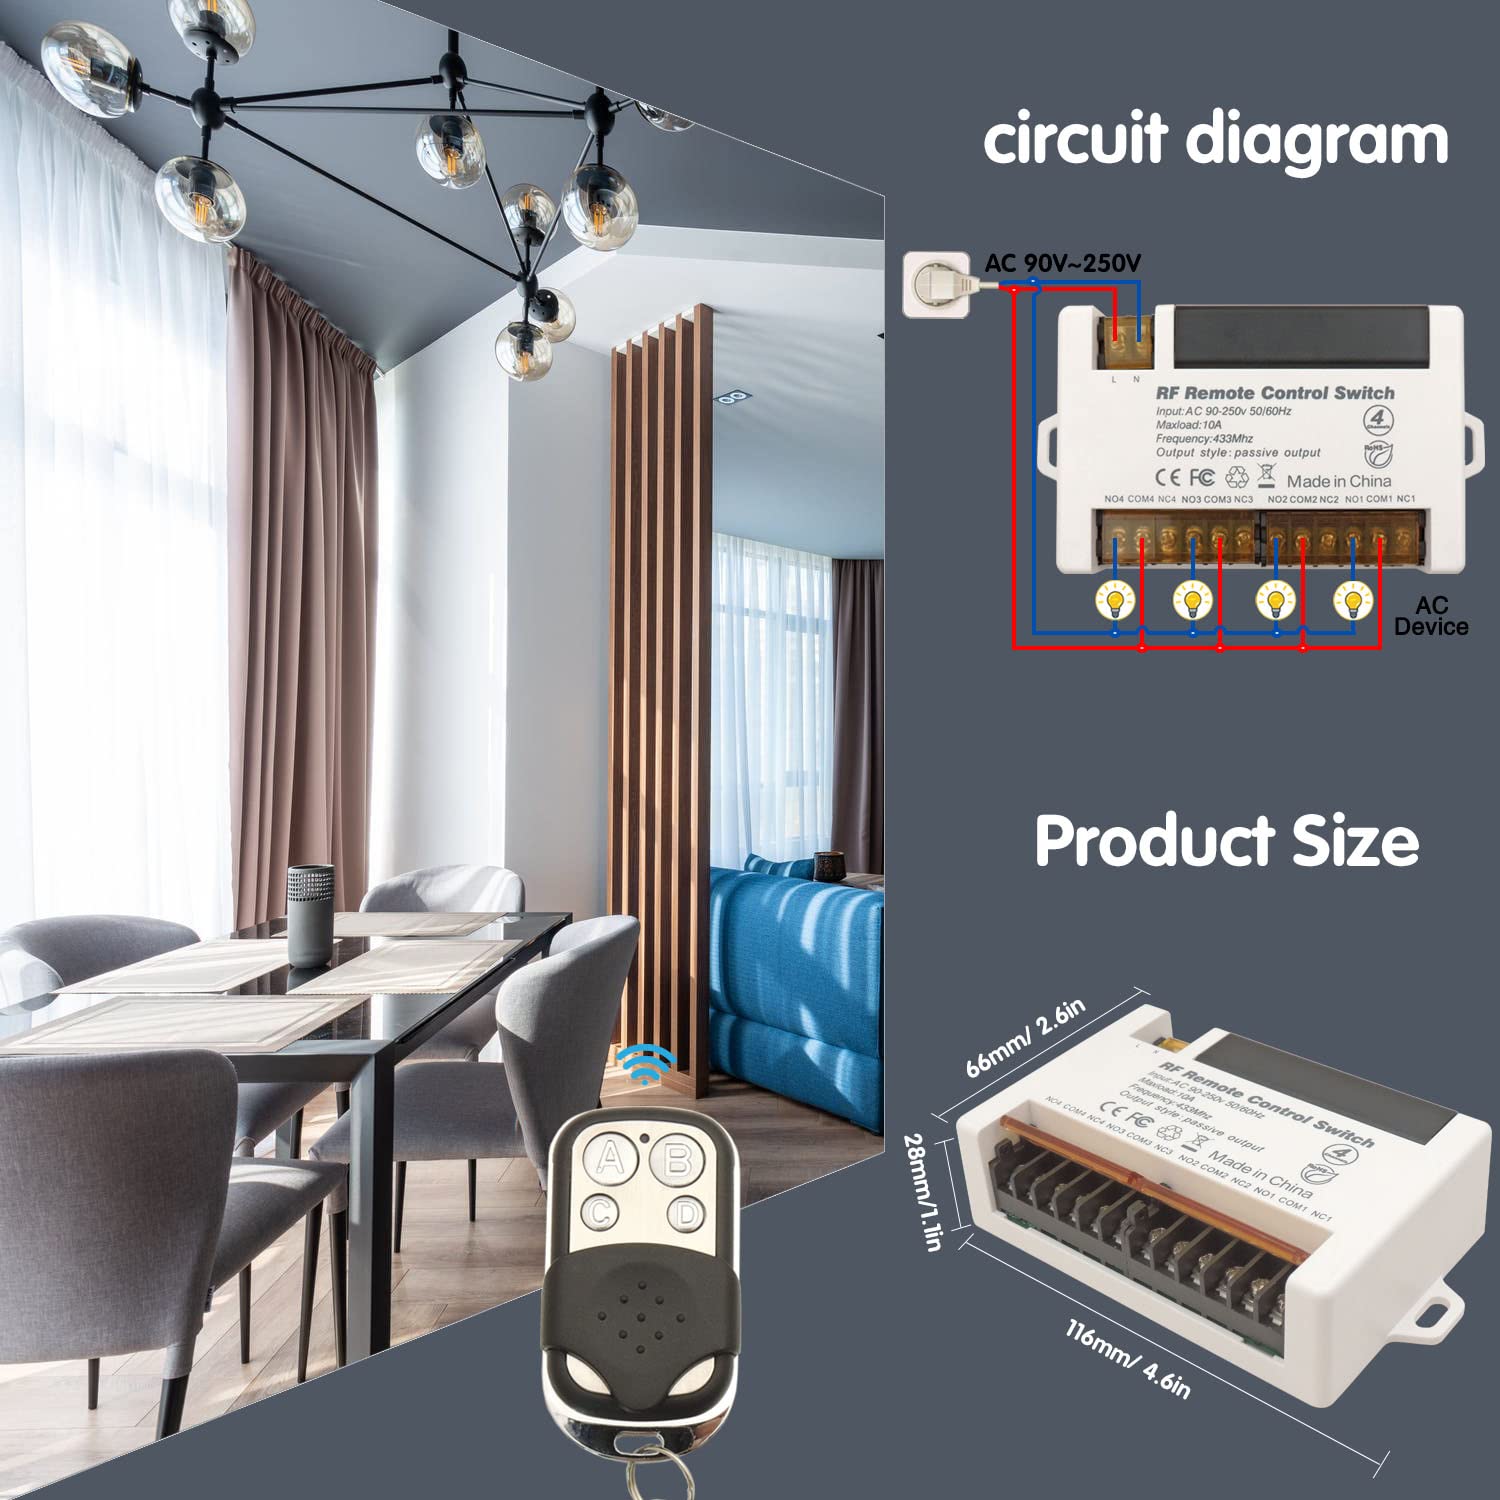
- Power input: Connect DC 6V-30V to VIN (+) and GND (-)
- Relay output (dry contacts): Four independent relays, each with NO/COM/NC
- Compatible cable types: Single-Strand Hard Wire (BV), Stranded Hard Wire (RV), Stranded Flexible Wire (BVR)
Warning
- Always disconnect power before performing any wiring or maintenance.
- Do not exceed the maximum current rating of 10A per relay.
- Ensure input voltage is within DC 6V-30V.
- Keep the device away from moisture, water, and extreme temperatures.
- If unsure about wiring, consult a qualified electrician.
- Usually the receiver and transmitter have been paired in factory. If not, reprogram them.
- Reset before you want to change the operating mode.
- After reset, all remote controls cannot work anymore.
- Replace the battery in time when the remote transmitter voltage is low.
Operating Mode
The receiver supports three operating modes. Follow the programming steps below to set the desired mode.
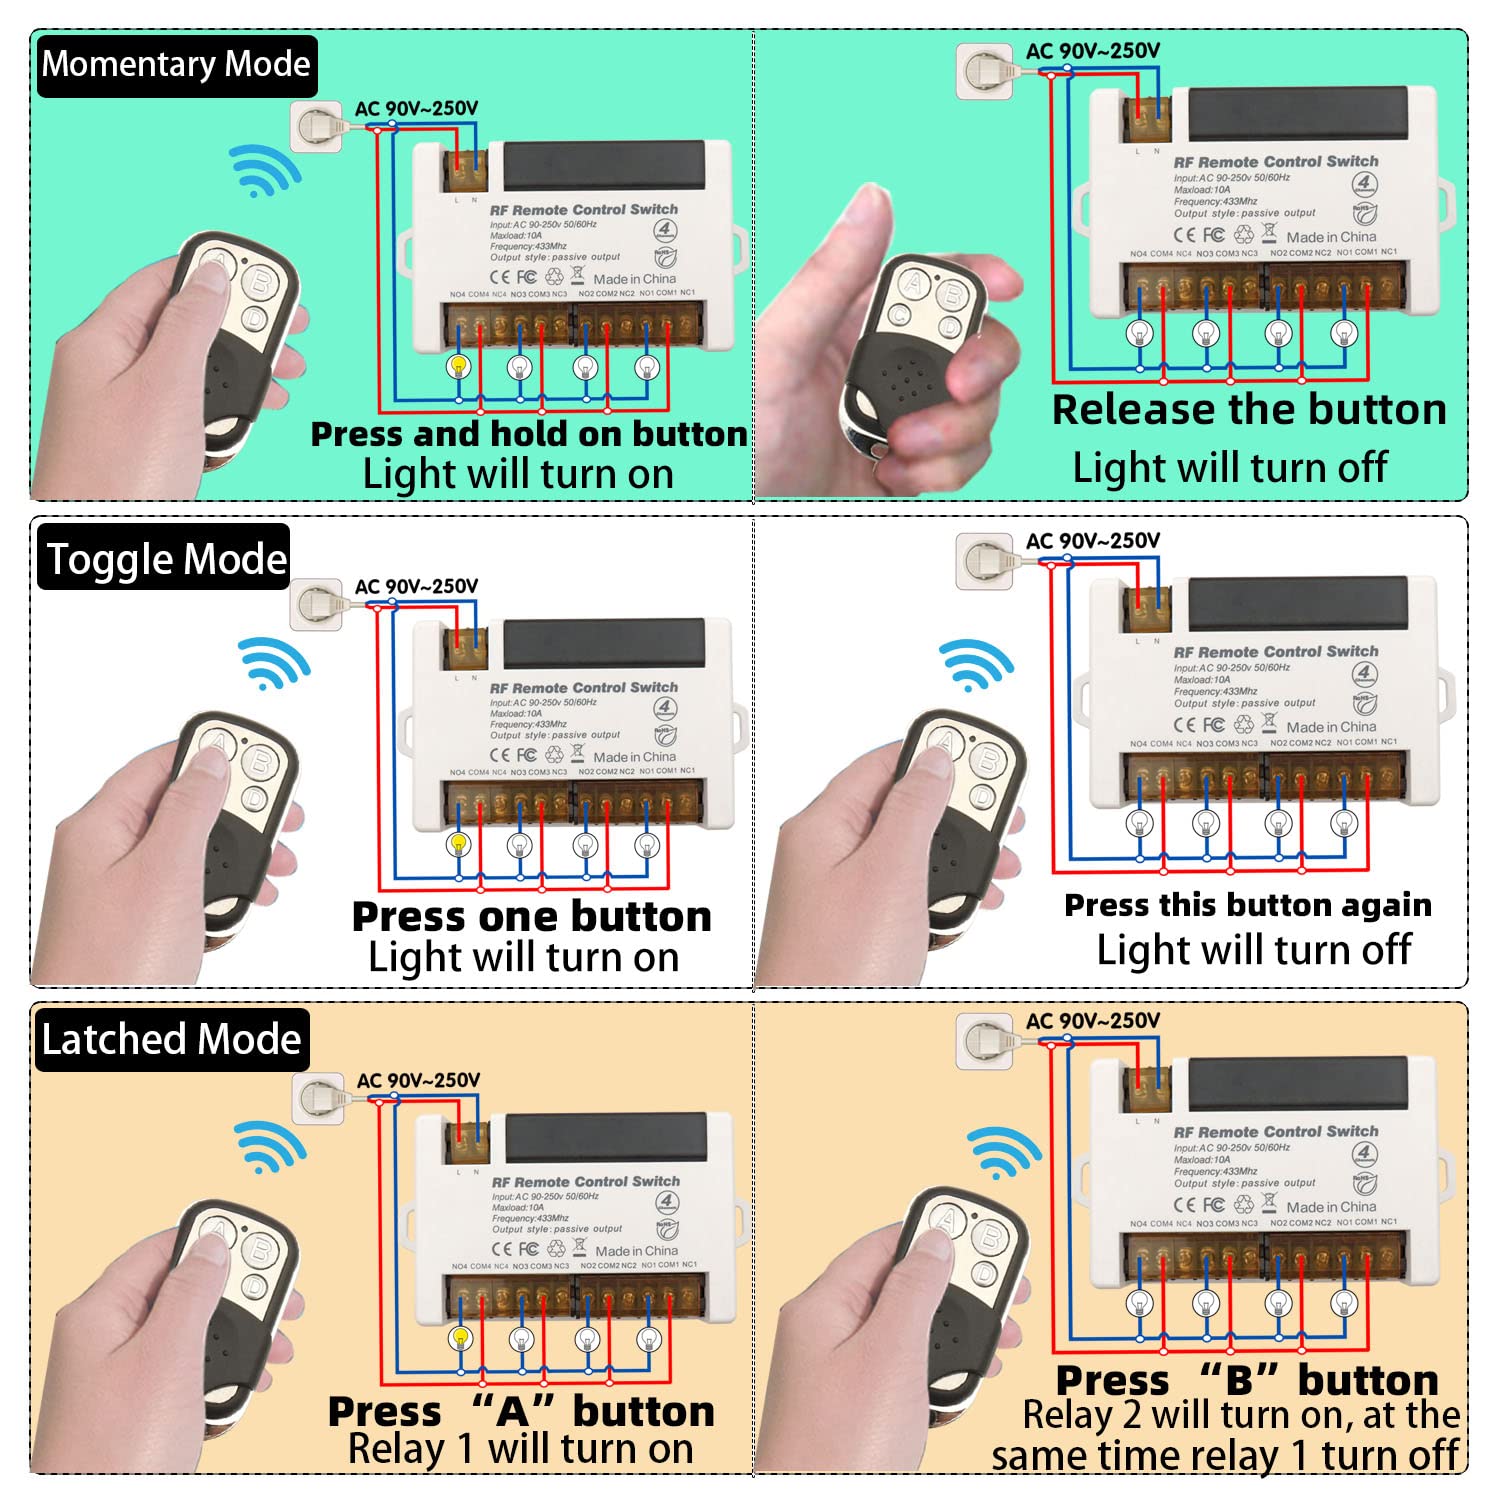
Momentary Mode
Press and hold a button → relay activates (device ON)
Release the button → relay deactivates (device OFF)
How to program:
- Press the learning button on the receiver 1 time. Wait approximately 3 seconds.
- Press button A on the remote control.
- Press button B on the remote control. Pairing successful.
Toggle Mode
Press a button once → relay activates (device ON)
Press the same button again → relay deactivates (device OFF)
How to program:
- Press the learning button on the receiver 2 times. Wait approximately 3 seconds.
- Press button A on the remote control.
- Press button B on the remote control. Pairing successful.
Latched Mode
Press ON button (e.g., A) → relay activates (device ON)
Press OFF button (e.g., B) → relay deactivates (device OFF)
How to program:
- Press the learning button on the receiver 3 times. Wait approximately 3 seconds.
- Press button A on the remote control.
- Press button B on the remote control. Pairing successful.
Note: Latched mode typically requires a remote with at least two buttons per relay pair. For 4-channel receiver, buttons A/B control Relay 1, and C/D control Relay 2, etc.
Reset
To clear all paired remote controls from the receiver’s memory, press the learning button 8 times consecutively. All previously paired remotes will be cleared. After reset, re-pair remotes as needed.

Troubleshooting
If the receiver and transmitter cannot operate normally, try the following steps:
- Device not responding to remote: Check transmitter batteries (replace if needed). Re-pair remote. Ensure no obstacles (metal objects, thick walls). Verify receiver power (indicator light on).
- Relay not activating/deactivating correctly: Check wiring to NO/COM/NC terminals. Confirm correct operating mode (reprogram if needed). Ensure load does not exceed 10A.
- Remote buttons not lighting up: Replace 12V battery.
- Persistent issues: Reset receiver (press learning button 8 times) and re-pair.
Maintenance
- Keep the receiver and transmitters dry and away from moisture.
- Clean with a soft, dry cloth. Do not use harsh chemicals or abrasive cleaners.
- Replace transmitter batteries when range decreases.
- Avoid extreme temperatures.
- Periodically check wiring connections for security and corrosion.
Contact
- WhatsApp: +86 15812381273
- Email: linktrol@icloud.com
If there is any question about the products, please contact us first. We will do our best to solve your problem. Thank you.


For an exclusive 10% OFF upgrade discount, Use code: FBA10.
Copy the code before visiting the shop.