SWITNEX 4-Channel Wireless Relay Remote Control Switch User Manual
SWITNEX 4-Channel Wireless Relay Remote Control Switch User Manual
| Technical Data | |
|---|---|
| Operating Voltage | AC 85V~240V (50/60Hz) |
| Current Rating | 10 Amps (Max Load) |
| Frequency | 433MHz RF |
| Output Style | Passive Output (Dry Contacts) |
| Contact Type | Normally Open (NO), Common (COM), Normally Closed (NC) |
| Remote Control Batteries | 2 x 12V batteries (included) |
| Receiving range (open space) | Up to 50 meters |
| Relay lifespan | Over 100,000 operations |
| Dimensions | 7.36 x 3.78 x 1.54 inches |
| Weight | 7.76 ounces |
| Material | Copper (Contact Material) |
| Country of Origin | China |
| Operating modes | Momentary, Toggle, Latched |
| Number of relays | 4 independent relays |
Product Detail
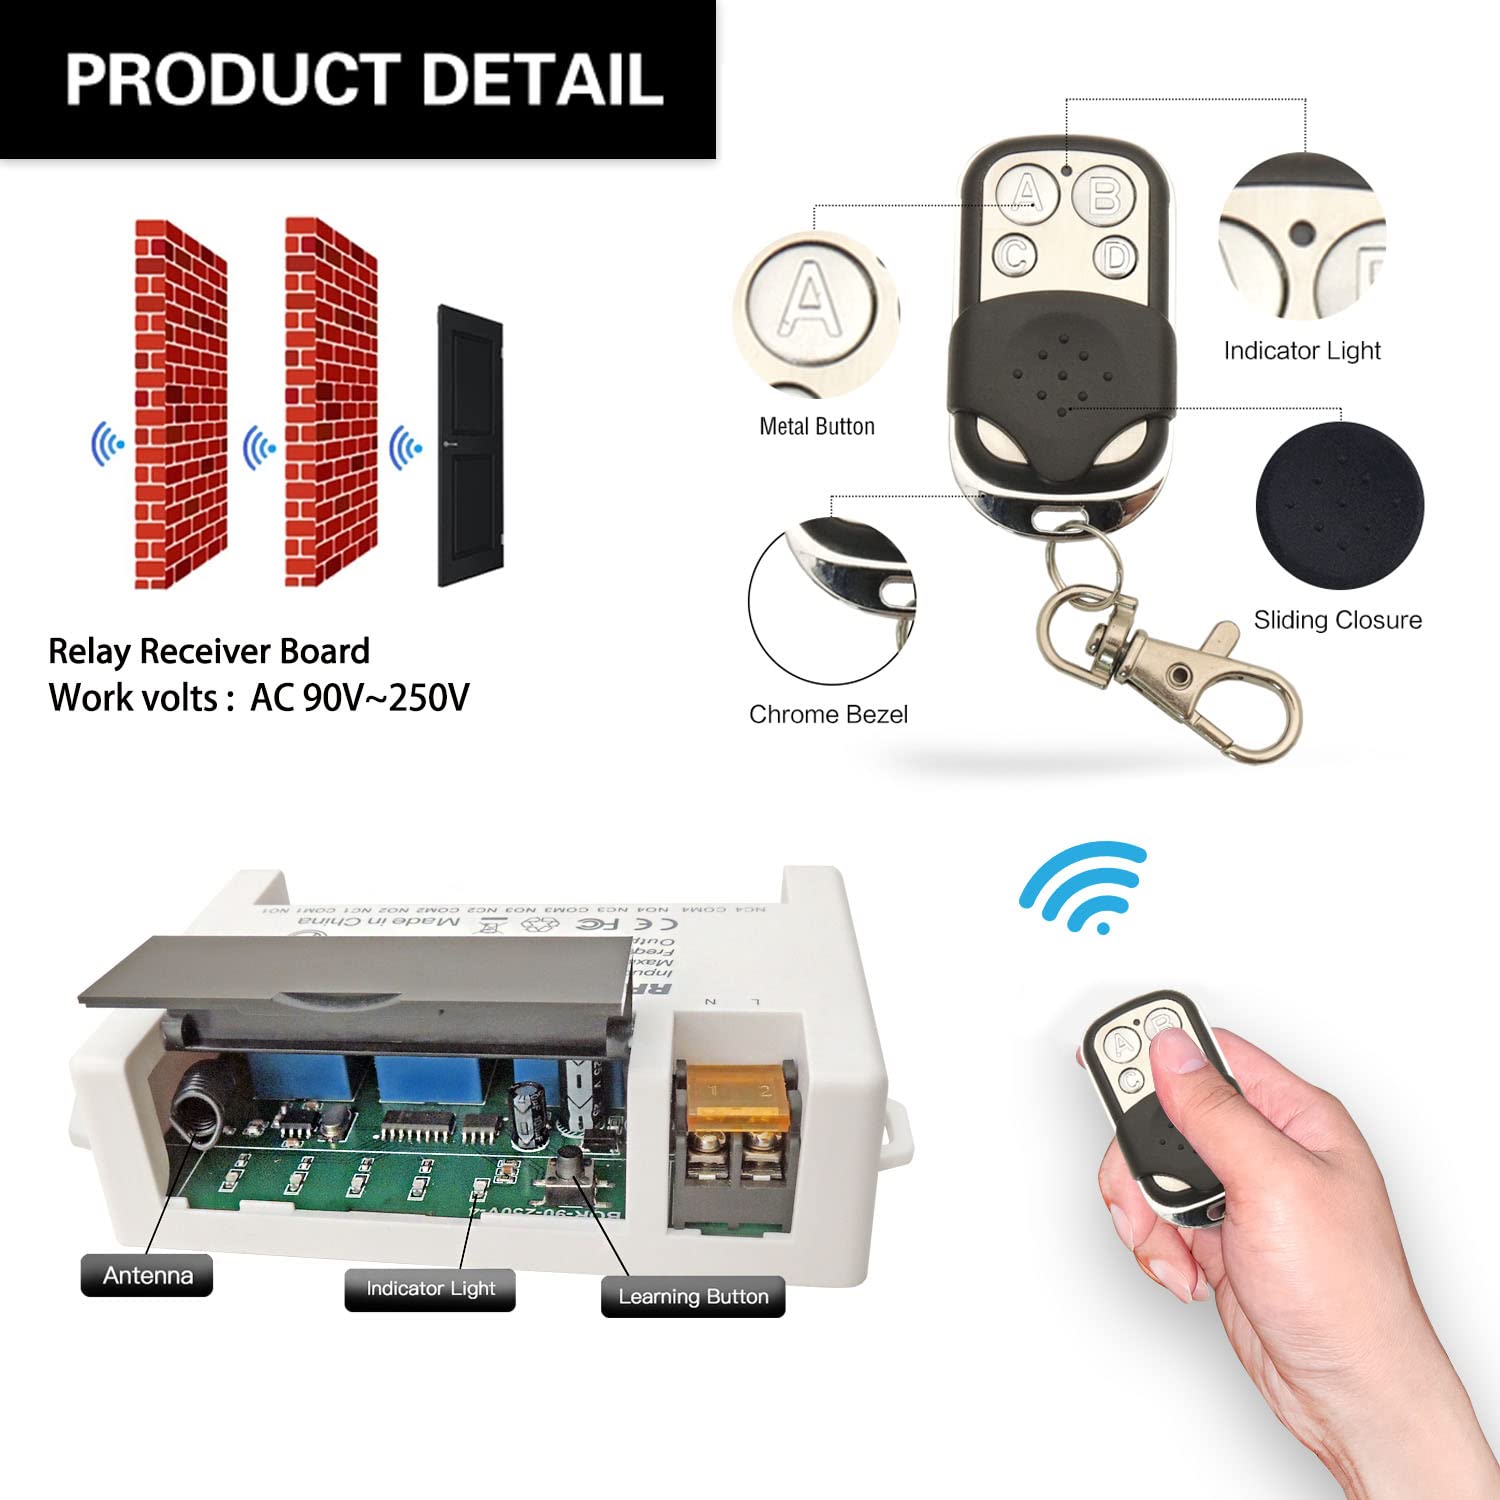
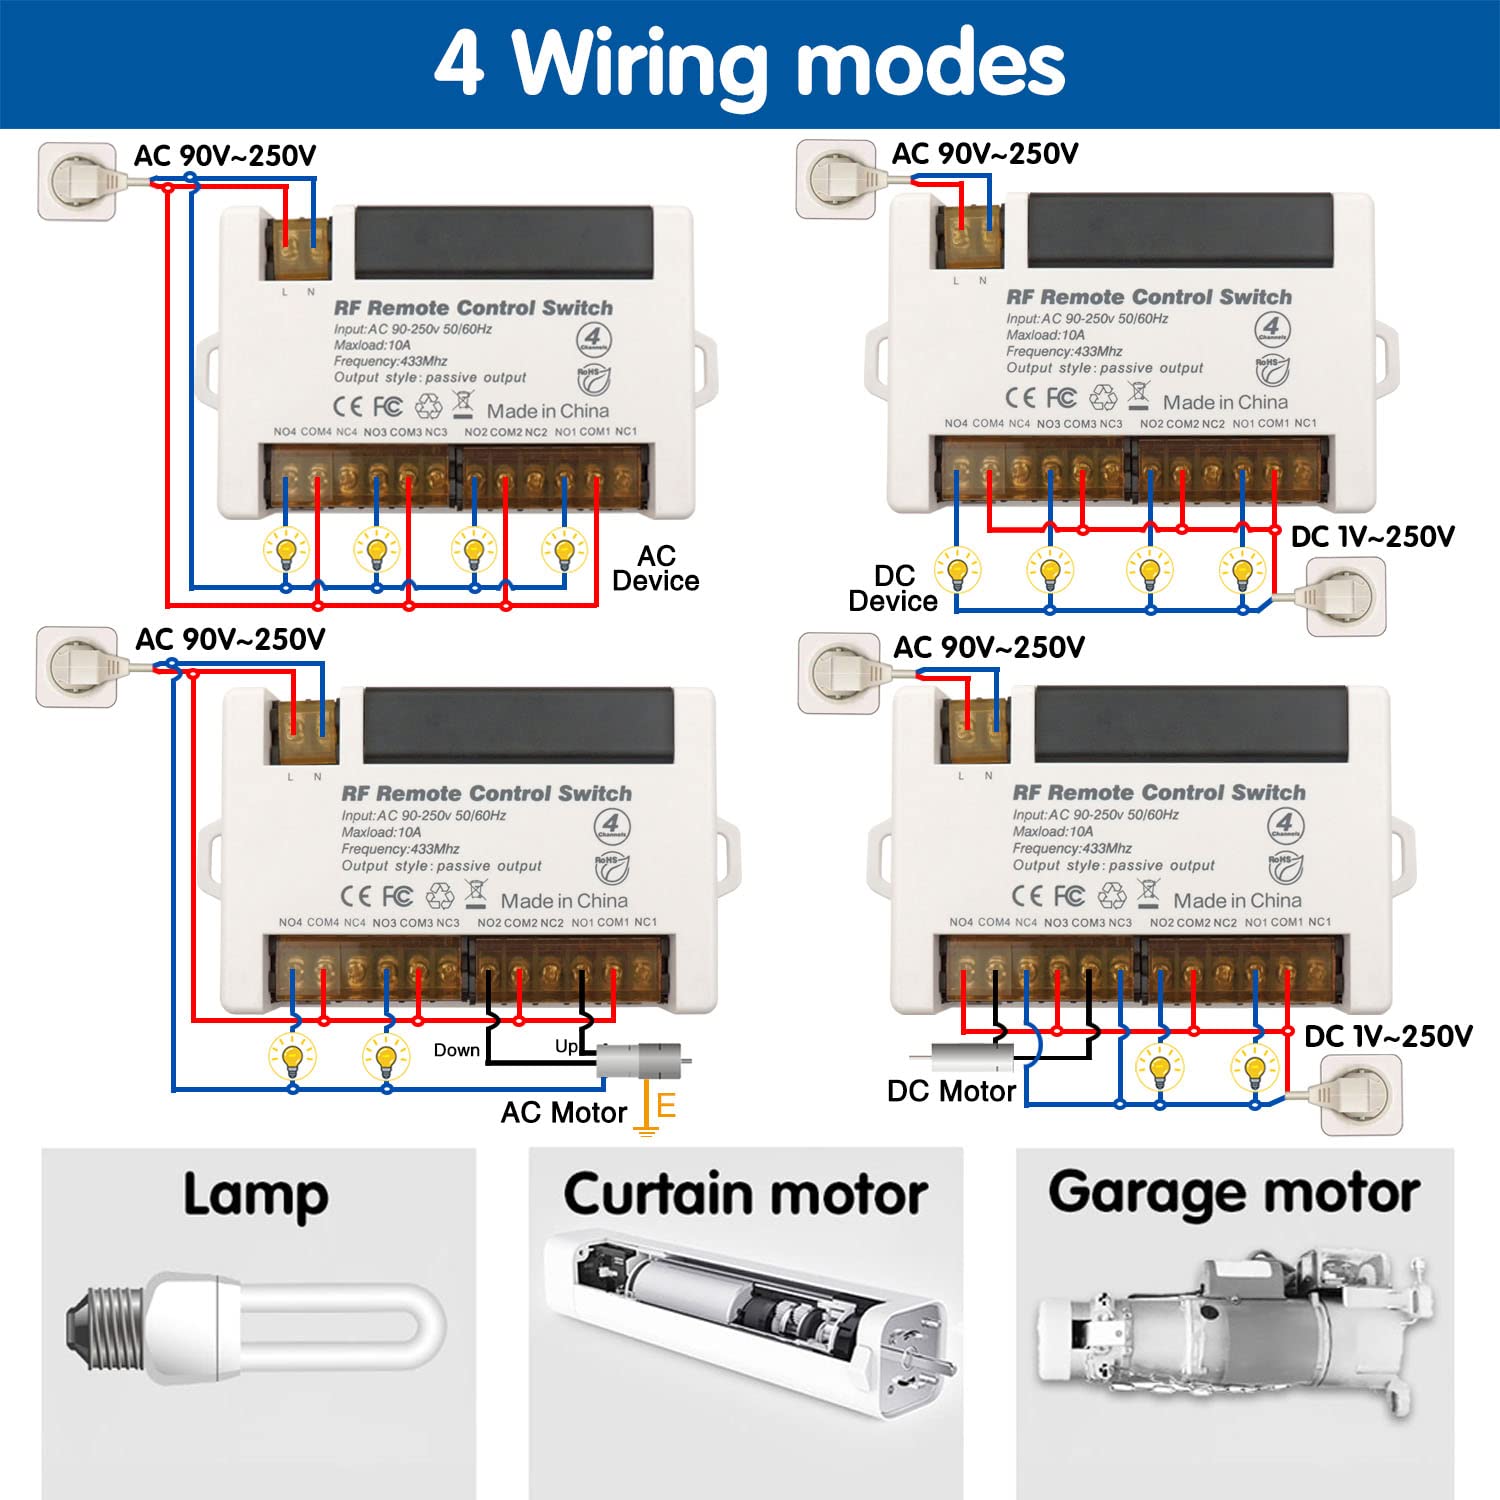
- Receiver module – 4 independent 10A relays, large screw terminals, learning button, indicator light, transparent flip cover for circuit adjustment
- 2 x Keyfob transmitters – 2 x 12V batteries included
- Each relay has three terminals: NO (Normally Open), COM (Common), NC (Normally Closed)
- Power input terminals: L (Live), N (Neutral) for AC 85V-240V
Wiring Diagram
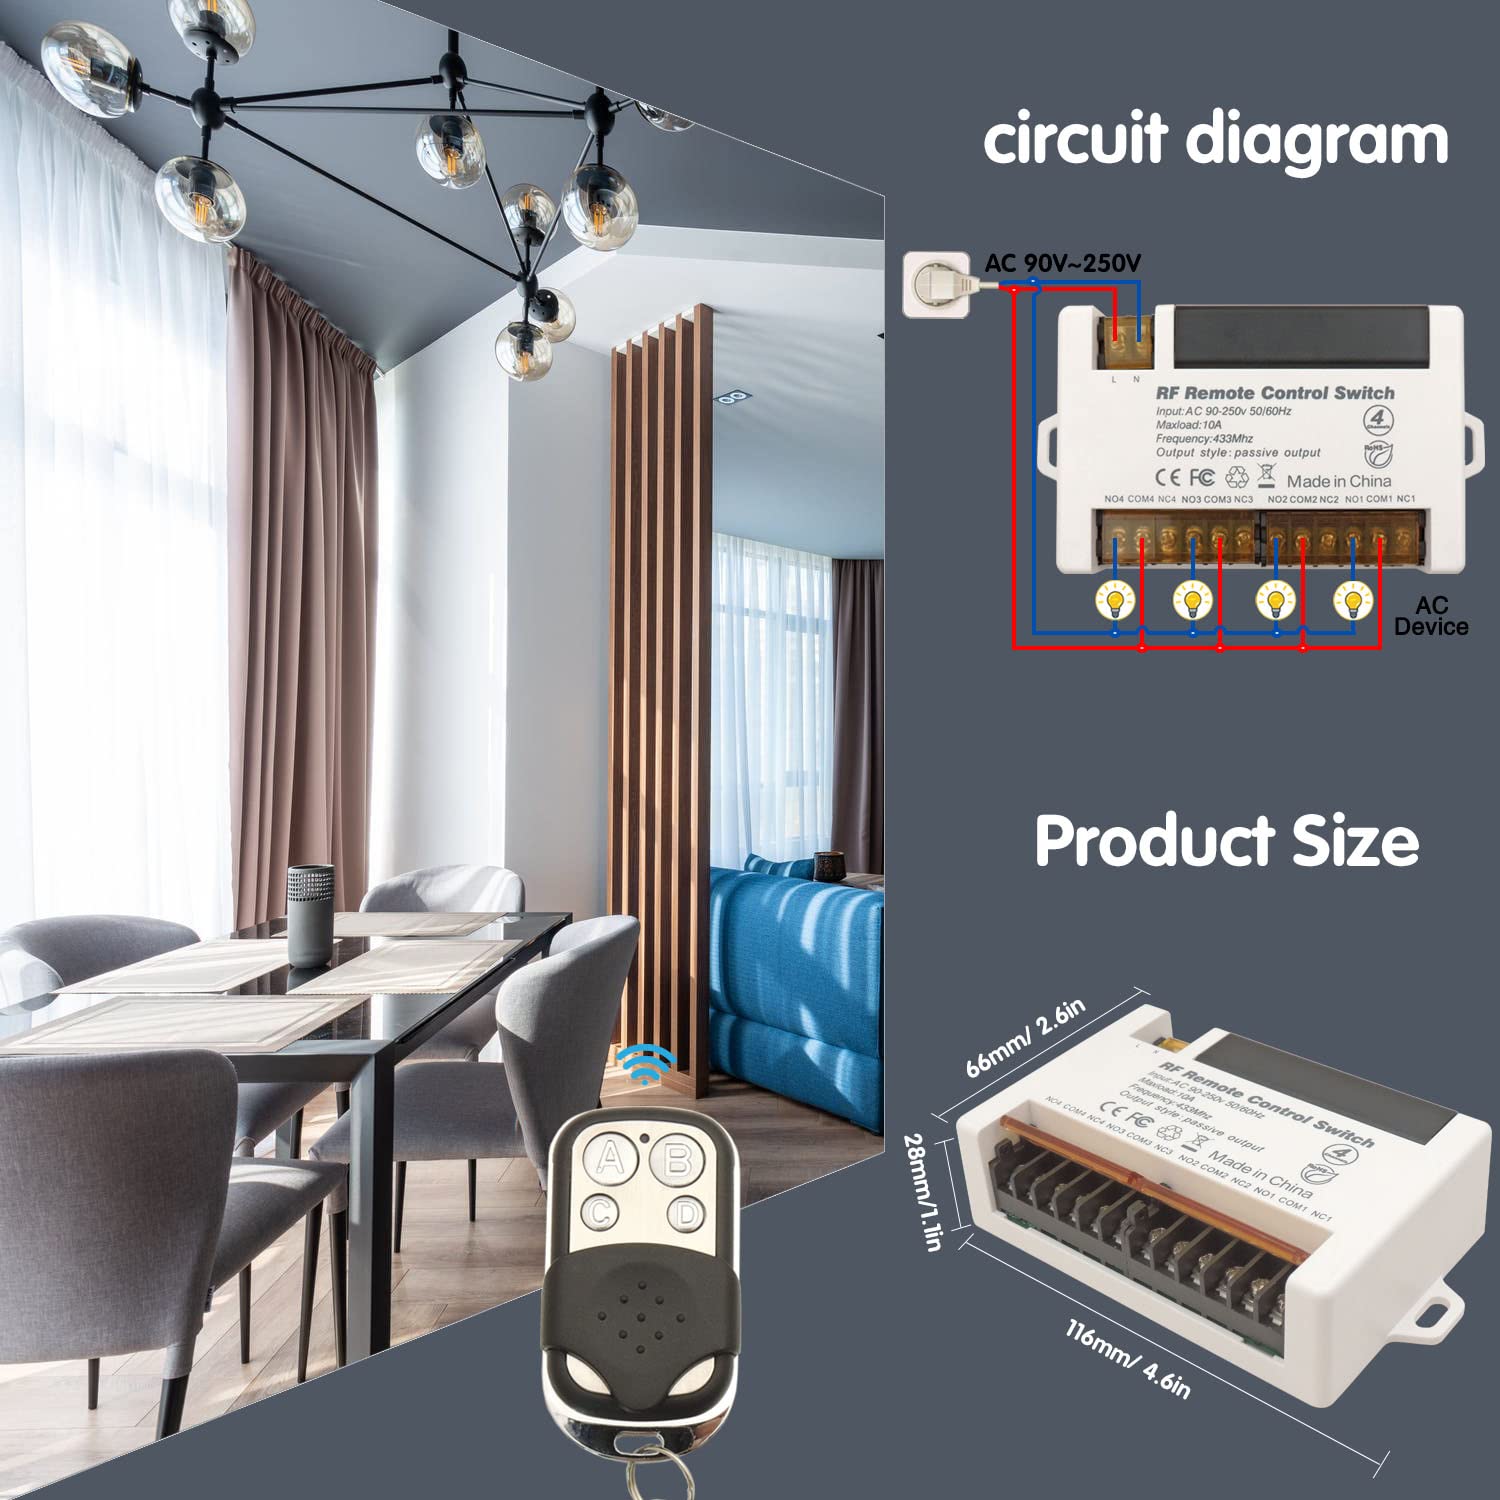

- Power input: Connect AC 85V-240V to L and N terminals
- Relay output (dry contacts): Four independent relays (NO/COM/NC)
- Compatible with various cable types; large screw terminals for easy installation
Warning
- Always disconnect power before performing any wiring or maintenance.
- Do not exceed the maximum current rating of 10A per relay.
- Ensure input voltage is within AC 85V-240V.
- Keep the device away from water, moisture, and extreme temperatures.
- If unsure about wiring, consult a qualified electrician.
- Usually the receiver and transmitter have been paired in factory. If not, reprogram them.
- Reset before you want to change the operating mode.
- After reset, all remote controls cannot work anymore.
- Replace the battery in time when the remote transmitter voltage is low.
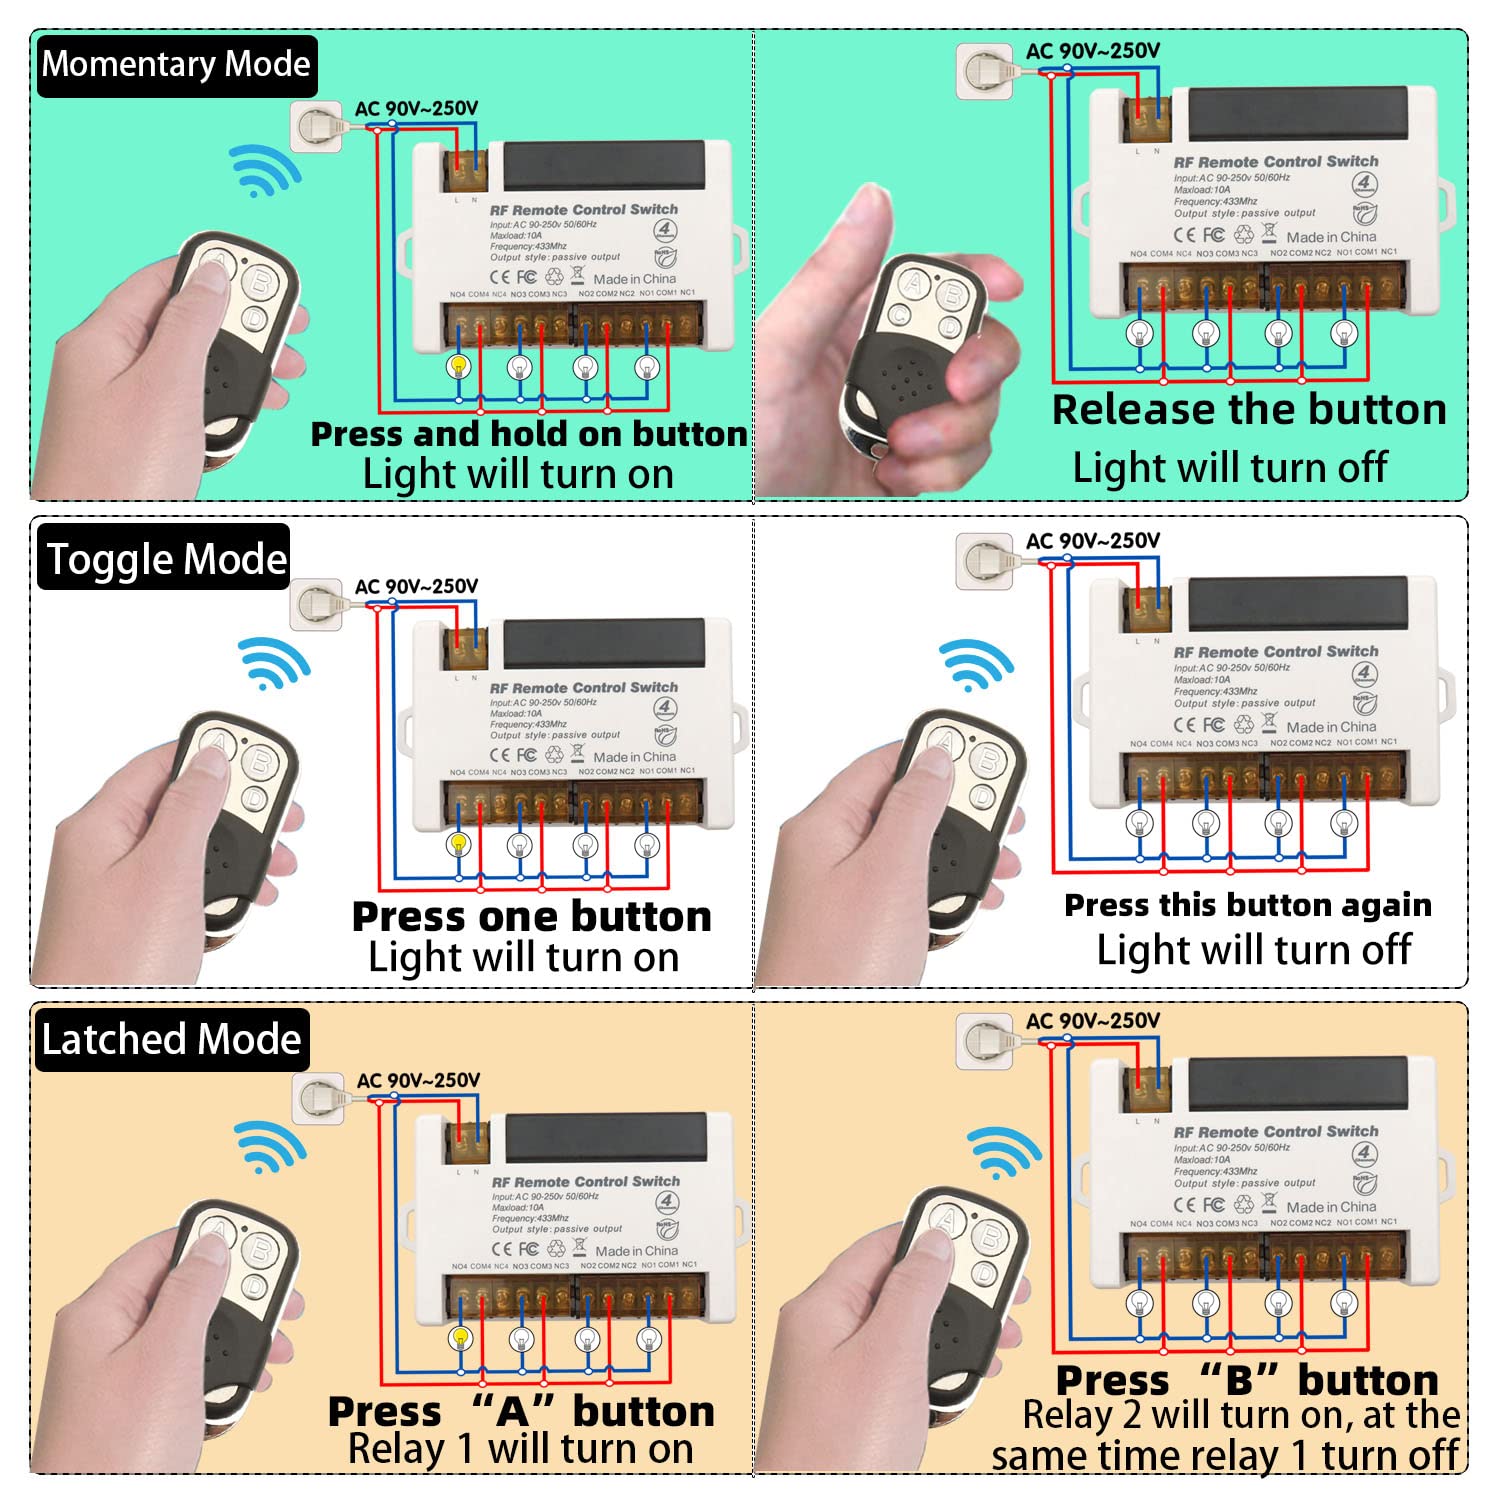
Operating Mode
The product is typically pre-programmed in Toggle Mode. Follow the steps below to change modes.
Momentary Mode (Mode 1)
Press and hold a button → relay activates (device ON)
Release the button → relay deactivates (device OFF)
How to program:
- Press the learning button on the receiver 1 time.
- Press button A on the remote control.
- Press button B on the remote control. Pairing successful.
Toggle Mode (Mode 2)
Press a button once → relay activates (device ON)
Press the same button again → relay deactivates (device OFF)
How to program:
- Press the learning button on the receiver 2 times.
- Press button A on the remote control.
- Press button B on the remote control. Pairing successful.
Latched Mode (Mode 3)
Press button A → Relay 1 turns ON, Relay 2 turns OFF
Press button B → Relay 2 turns ON, Relay 1 turns OFF
How to program:
- Press the learning button on the receiver 3 times.
- Press button A on the remote control.
- Press button B on the remote control. Pairing successful.
Note: Latched mode provides alternating control between two relays. It requires a remote with at least 2 buttons for independent control of two relays.
Reset
To clear all programmed remote controls from the receiver’s memory, press the learning button 8 times. The indicator light will flash, confirming the reset. After reset, previously paired remotes will no longer work; re-program as needed.

Troubleshooting
If the receiver and transmitter cannot operate normally, try the following steps:
- No response from remote: Check remote batteries (2 x 12V). Ensure receiver is powered (AC 85V-240V). Verify remote is properly paired. Ensure within 50m range (walls may reduce signal).
- Incorrect operating mode: Re-program the desired mode following the instructions.
- Relay not activating/deactivating: Check wiring connections. Ensure load does not exceed 10A.
Maintenance
- Keep the device clean and free from dust. Use a soft, dry cloth.
- Avoid exposing to extreme temperatures, humidity, or direct sunlight.
- Periodically check wiring connections for security and corrosion.
- Do not open the main receiver unit beyond the learning button access panel.
Contact
- WhatsApp: +86 15812381273
- Email: linktrol@icloud.com
If there is any question about the products, please contact us first. We will do our best to solve your problem. Thank you.


For an exclusive 10% OFF upgrade discount, Use code: FBA10.
Copy the code before visiting the shop.